The Boomerang
The Boomerang
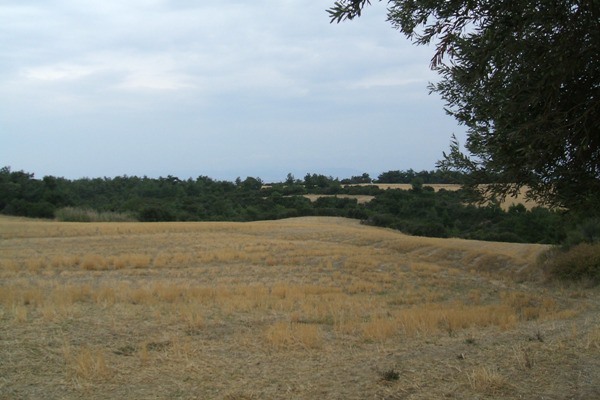
The Boomerang (The photo above looks back towards the Boomerang Redoubt area from the north east.)
As the allies advanced at painful cost along Gully Ravine and its spurs in April and May 1915, the Turkish defenders established a redoubt – a fortified position with multiple machine gun emplacements – on an area of slightly raised land on the east side of the gully. A nearby Turkish trench which looped back on itself had already been named the ‘Boomerang’ trench by the allies, so the fort, naturally, was called the ‘Boomerang Redoubt’.
On the night of 10th June 1915 forces from the 2/SWB and the 1/Border Regiments attacked this area, and fighting continued for almost a week. The Boomerang trench was finally taken, earning Captain O’Sullivan of the 1/Royal Fusiliers a VC for his bombing action on 18th June, but the Boomerang Redoubt itself eventually fell back in to Turkish hands.
At the Battle of Gully Ravine, on 28th June, it was recognised that the Boomerang Redoubt would have to be taken and silenced before the main advance took place. Trench mortars and howitzers pounded the area before zero hour, when 1/Borderers went over the top and attacked it. Losses were huge, since the relative lack of naval and land-based artillery support on this side of the gully had left Turkish machine guns intact in some of the further H trenches. The Boomerang was taken however, and much of the surrounding trench system, H10 and H11, was gained by the SWB.
The fighting in this area was some of the fiercest in the theatre. Today, the area of the Boomerang is a quiet indented corner of a field on the east edge of the ravine, and any casual walker would have no clue as to the desperate battles that occurred here. It is still easy, however, to see why the Turkish chose the location to fortify. The area commands a view over the ravine, with clear fields of fire to the left, right and into the gully itself. From here, it is possible, even with all the undergrowth, to see G Bluff to the south west, and Fusilliers Bluff across the fields to the north.
Note: The Boomerang area can be difficult to locate, simply because there is little to distinguish it from the surrounding similar landscape. Here are two methods.
From C Redoubt in Gully Ravine, climb out onto the east side via Frith Walk Trench (see earlier screen) and the paths that run along its side (essential since the trench itself becomes impassably overgrown in places). Once you emerge from the trees and are facing onto the fields eastwards, looking in the general direction of Twelve Tree Copse, turn left and skirt the edge of the field, with the tree line on your left shoulder. After a hundred or so metres, the field line turns westwards into an indent above the gully. This first corner is the area of the Boomerang, centre and middle distance in the above photo,which is viewed from the north.
Alternatively, find the area of Cawley’s Crater and the Eastern Birdcage (see next tour page) and using a map or Google Earth, follow the land southward to the Boomerang.
The GPS coordinates for the Boomerang are 40.093180°, 26.208328°, and What3words, ///sled.debtors.hardest